


|
|
 |
|
Welcome to the GSM-Forum forums. You are currently viewing our boards as a guest which gives you limited access to view most discussions and access our other features. Only registered members may post questions, contact other members or search our database of over 8 million posts. Registration is fast, simple and absolutely free so please - Click to REGISTER! If you have any problems with the registration process or your account login, please contact contact us . |
| |||||||
| Register | FAQ | Donate | Forum Rules | Root any Device | ★iPhone Unlock★ | ★ Direct Codes ★ | Direct Unlock Source |
| Off Topic Zone Here all other messages... |
 |
| | LinkBack | Thread Tools | Display Modes |
 12-24-2008, 21:25
| #1 (permalink) |
| No Life Poster  Join Date: Nov 2005 Location: Sindhu Desh Age: 36
Posts: 8,135
Member: 199814 Status: Offline Thanks Meter: 1,960 | Windows XP Top Tricks How to create a boot disk How This Tip Works
|
 |
| The Following 3 Users Say Thank You to asadnow2k For This Useful Post: |
|
12-24-2008, 21:28
| #2 (permalink) |
| No Life Poster Join Date: Nov 2005 Location: Sindhu Desh Age: 36
Posts: 8,135
Member: 199814 Status: Offline Thanks Meter: 1,960 | Enabling and Disabling The Windows XP Firewall Enabling and Disabling The Windows XP Firewall Windows XP contains its own firewall. A firewall is a security system that acts as a protective boundary between a network and the outside world. Internet Connection Firewall (ICF) is firewall software that is used to set restrictions on what information is communicated from your home or small office network to and from the Internet to your network. If your network uses Internet Connection Sharing(ICS) to provide Internet access to multiple computers, ICF should be enabled on the shared Internet connection. However, ICS and ICF can be enabled separately. You should enable ICF on the Internet connection of any computer that is connected directly to the Internet. To check to see if ICF is enabled or to enable the firewall, see Enable or disable Internet Connection Firewall. ICF also protects a single computer connected to the Internet. If you have a single computer connected to the Internet with a cable modem, a DSL modem, or a dial-up modem, ICF protects your Internet connection. You should not enable ICF on VPN connections because it will interfere with the operation of file sharing and other VPN functions. 1: Enable the ICF by right clicking on your Internet or Network connection and then going to the ADVANCED option and ticking the ICF enable box.  |
| |
| The Following 2 Users Say Thank You to asadnow2k For This Useful Post: |
|
12-24-2008, 21:30
| #3 (permalink) |
| No Life Poster Join Date: Nov 2005 Location: Sindhu Desh Age: 36
Posts: 8,135
Member: 199814 Status: Offline Thanks Meter: 1,960 | Adding Programs To Stay On The Start Menu Adding Programs To Stay On The Start Menu Right click on any .exe file in Explorer, My Computer, Desktop and select 'Pin to Start Menu', the program is then displayed on the start menu, above the separator line. To remove it, click the file on the start menu and select 'Unpin from Start Menu'. Below you can check the before and after shots 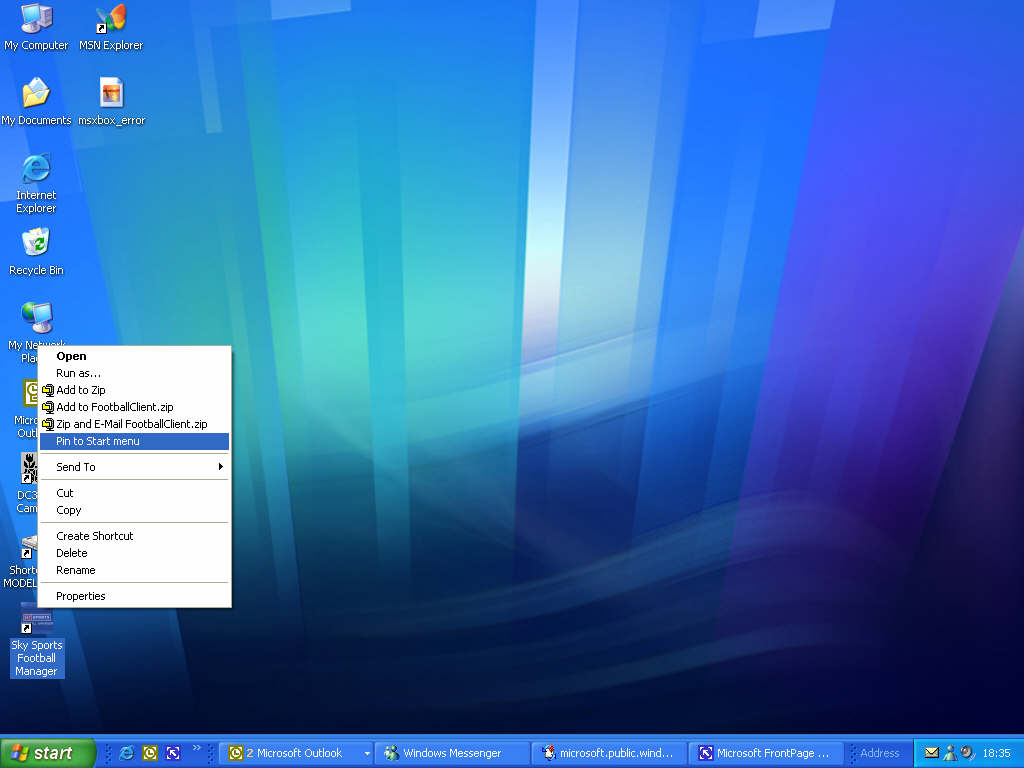 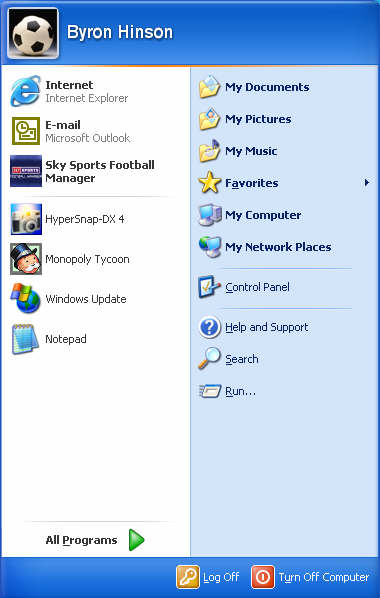 |
| |
| The Following 4 Users Say Thank You to asadnow2k For This Useful Post: |
|
12-24-2008, 21:32
| #4 (permalink) |
| No Life Poster Join Date: Nov 2005 Location: Sindhu Desh Age: 36
Posts: 8,135
Member: 199814 Status: Offline Thanks Meter: 1,960 | Make Use Of Your Windows Key Windows: Display the Start menu Windows + D: Minimize or restore all windows Windows + E: Display Windows Explorer Windows + F: Display Search for files Windows + Ctrl + F: Display Search for computer Windows + F1: Display Help and Support Center Windows + R: Display Run dialog box Windows + break: Display System Properties dialog box Windows + shift + M: Undo minimize all windows Windows + L: Lock the workstation Windows + U: Open Utility Manager Windows + Q: Quick switching of users (Powertoys only) Windows + Q: Hold Windows Key, then tap Q to scroll thru the different users on your PC |
| |
| The Following 2 Users Say Thank You to asadnow2k For This Useful Post: |
|
12-24-2008, 21:32
| #5 (permalink) |
| No Life Poster Join Date: Nov 2005 Location: Sindhu Desh Age: 36
Posts: 8,135
Member: 199814 Status: Offline Thanks Meter: 1,960 | How Do I Install Netmeeting? 1. Click START then RUN 2. Enter "conf" without the quotes That's it - now you can Netmeet to your hearts content. |
| |
| The Following 2 Users Say Thank You to asadnow2k For This Useful Post: |
|
12-24-2008, 21:33
| #6 (permalink) |
| No Life Poster Join Date: Nov 2005 Location: Sindhu Desh Age: 36
Posts: 8,135
Member: 199814 Status: Offline Thanks Meter: 1,960 | Disable Error Reporting As many of you would have noticed - every time a Microsoft program crashes in Windows XP - and Error Report comes up allowing you to send some information on the crash to Microsoft. Well this can get quite annoying, so here is how you disable it. 1. Open Control Panel 2. Click on Preformance and Maintenance. 3. Click on System. 4. Then click on the Advanced tab 5. Click on the error reporting button on the bottom of the windows. 6. Select Disable error reporting. 7. Click OK 8. Click OK |
| |
| The Following 4 Users Say Thank You to asadnow2k For This Useful Post: |
|
12-24-2008, 21:33
| #7 (permalink) |
| No Life Poster Join Date: Nov 2005 Location: Sindhu Desh Age: 36
Posts: 8,135
Member: 199814 Status: Offline Thanks Meter: 1,960 | Turn Off Thumbnail Caching The fact is though that these days having a thumbnail cache isn't that important, the thumbnails load up here in my machine in seconds without it. So here is how you remove the caching system for thumbnails: 1. Click on "CONTROL PANEL" from the Start Menu. 2. Click on "FOLDER OPTIONS" in the Control Panel. 3. Click the view tab 4. Finally - tick the "DO NOT CACHE THUMBNAILS" box and then click APPLY. Your Windows XP system will now no longer cache thumbnails. If you wish to go back to caching them, get back to the folder options menu like we did about and untick the box. |
| |
| The Following 2 Users Say Thank You to asadnow2k For This Useful Post: |
|
12-24-2008, 21:34
| #8 (permalink) |
| No Life Poster Join Date: Nov 2005 Location: Sindhu Desh Age: 36
Posts: 8,135
Member: 199814 Status: Offline Thanks Meter: 1,960 | Change Internet Explorer Browser Title Text 1. Click Start > Run > Type gpedit.msc 2. Click User Configuration > Windows Setting > Internet Explorer Maintenance > Browser User Interface 3. Double click on Browser Title 4. Click on Customize Title Bars 5. Change the text to what whatever you want 6. Click on Ok Now you changed the title of your browser and you sure see what you wrote when you open a New Widow. |
| |
| The Following 2 Users Say Thank You to asadnow2k For This Useful Post: |
|
12-24-2008, 21:35
| #9 (permalink) |
| No Life Poster Join Date: Nov 2005 Location: Sindhu Desh Age: 36
Posts: 8,135
Member: 199814 Status: Offline Thanks Meter: 1,960 | Reading and Understanding The Events Log You can use Event Viewer to view and manage the event logs, gather information about hardware and software problems, and monitor Windows security events. * To open Event Viewer, click Start, click Control Panel, double-click Administrative Tools, and then double-click Event Viewer. * For information about using Event Viewer, in Event Viewer, on the Action menu, click Help. |
| |
| The Following 2 Users Say Thank You to asadnow2k For This Useful Post: |
|
12-24-2008, 21:35
| #10 (permalink) |
| No Life Poster Join Date: Nov 2005 Location: Sindhu Desh Age: 36
Posts: 8,135
Member: 199814 Status: Offline Thanks Meter: 1,960 | How To Uninstall Windows Messenger On XP Systems without SP1: Click Start / Run Then type the following: RunDll32 advpack.dll,LaunchINFSection %windir%\INF\msmsgs.inf,BLC.Remove Press ENTER Restart Windows On XP Systems WITH SP 1: Control Panel Add / Remove Programs Click on "Add/Remove Windows Components" on the left UNcheck "Windows Messenger" Click "NEXT" Click "Finish" Reboot |
| |
| The Following 2 Users Say Thank You to asadnow2k For This Useful Post: |
|
12-24-2008, 21:37
| #11 (permalink) |
| No Life Poster Join Date: Nov 2005 Location: Sindhu Desh Age: 36
Posts: 8,135
Member: 199814 Status: Offline Thanks Meter: 1,960 | Where has Scan Disk gone? 1: Open My Computer, and then select the local disk you want to check. 2: On the File menu, click Properties. 3: On the Tools tab, under Error-checking, click Check Now. 4: Under Check disk options, select the Scan for and attempt recovery of bad sectors check box. * All files must be closed for this process to run. If the volume is currently in use, a message box will appear prompting you to indicate whether or not you want to reschedule the disk checking for the next time you restart your system. Then, the next time you restart your system, disk checking will run. Your volume will not be available to perform other tasks while this process is running. * If your volume is formatted as NTFS, Windows automatically logs all file transactions, replaces bad clusters, and stores copies of key information for all files on the NTFS volume. 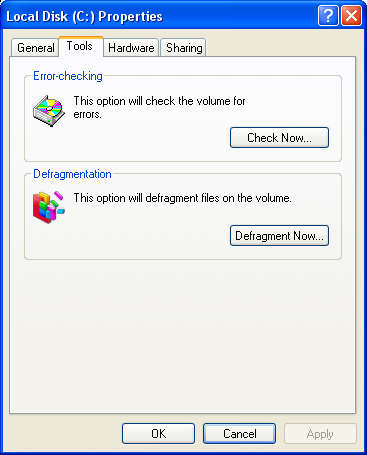 |
| |
| The Following 2 Users Say Thank You to asadnow2k For This Useful Post: |
|
12-24-2008, 21:38
| #12 (permalink) |
| No Life Poster Join Date: Nov 2005 Location: Sindhu Desh Age: 36
Posts: 8,135
Member: 199814 Status: Offline Thanks Meter: 1,960 | Speed Up Browsing When you connect to a web site your computer sends information back and forth. Some of this information deals with resolving the site name to an IP address, the stuff that TCP/IP really deals with, not words. This is DNS information and is used so that you will not need to ask for the site location each and every time you visit the site. Although Windows XP and Windows XP have a pretty efficient DNS cache, you can increase its overall performance by increasing its size. You can do this with the registry entries below: Windows Registry Editor Version 5.00 [HKEY_LOCAL_MACHINE\SYSTEM\CurrentControlSet\Servic es\Dnscache\Parameters] "CacheHashTableBucketSize"=dword:00000001 "CacheHashTableSize"=dword:00000180 "MaxCacheEntryTtlLimit"=dword:0000fa00 "MaxSOACacheEntryTtlLimit"=dword:0000012d Make a new text file and rename it to dnscache.reg. Then copy and paste the above into it and save it. Merge it into the registry. |
| |
| The Following 2 Users Say Thank You to asadnow2k For This Useful Post: |
|
12-24-2008, 21:39
| #13 (permalink) |
| No Life Poster Join Date: Nov 2005 Location: Sindhu Desh Age: 36
Posts: 8,135
Member: 199814 Status: Offline Thanks Meter: 1,960 | Never Re-Activate After Installation If you have to reinstall Windows XP you normally will have to reactivate too. Well not anymore. Just copy wpa.dbl after you activated the first time. It is located in the WINDOWS\system32 folder. Now if you reinstall Windows XP just copy the file back and you're up and running again. |
| |
| The Following 2 Users Say Thank You to asadnow2k For This Useful Post: |
|
12-24-2008, 21:39
| #14 (permalink) |
| No Life Poster Join Date: Nov 2005 Location: Sindhu Desh Age: 36
Posts: 8,135
Member: 199814 Status: Offline Thanks Meter: 1,960 | Show Hidden Files & Folders Wondering how to find files or folders that you have used before but they seem to have vanished in Windows XP? 1. In any folder that contains files. Click on the tools menu and select folder options. 2. Then click on the view tab. 3. Locate where it lists Hidden files and folders and select Show hidden files and folders. 4. Click OK. |
| |
| The Following 2 Users Say Thank You to asadnow2k For This Useful Post: |
|
12-24-2008, 21:40
| #15 (permalink) |
| No Life Poster Join Date: Nov 2005 Location: Sindhu Desh Age: 36
Posts: 8,135
Member: 199814 Status: Offline Thanks Meter: 1,960 | Disable Bootup Splash Screen You can, if you feel like it, disable the Windows XP boot up splash screen. Although this doesn't speed boot times at all, it does allow you to see if there are any boot up messages appearing on your computer that might otherwise be covered up. 1. Edit boot.ini 2. Add " /noguiboot" right after "/fastdetect". You will need to restart your PC for the splash screen to disappear. To enable the splash screen again, just remove the switch that you added. |
| |
| The Following 2 Users Say Thank You to asadnow2k For This Useful Post: |
|
| Bookmarks |
| |
 Similar Threads
 | ||||
| Thread | Thread Starter | Forum | Replies | Last Post |
| windows xp tricks | abdullaroz75 | Off Topic Zone | 0 | 10-06-2009 14:35 |
| windows xp tricks | bpcentergtk1 | Off Topic Zone | 1 | 07-06-2008 19:46 |


 Linear Mode


