


|
|
 |
|
Welcome to the GSM-Forum forums. You are currently viewing our boards as a guest which gives you limited access to view most discussions and access our other features. Only registered members may post questions, contact other members or search our database of over 8 million posts. Registration is fast, simple and absolutely free so please - Click to REGISTER! If you have any problems with the registration process or your account login, please contact contact us . |
| |||||||
| Register | FAQ | Donate | Forum Rules | Root any Device | ★iPhone Unlock★ | ★ Direct Codes ★ | Direct Unlock Source |
 |
| | LinkBack | Thread Tools | Display Modes |
 07-27-2008, 11:04
| #1 (permalink) |
| No Life Poster  Join Date: Apr 2007 Location: Taguig CT Age: 42
Posts: 2,507
Member: 488875 Status: Offline Sonork: 100.1626294 Thanks Meter: 1,129 |  Chances for survival? Slim The first step to disassemble the device is to remove the lower black plastic piece; heating it up and squeezing a razorblade in there made it not only possible, but easy: 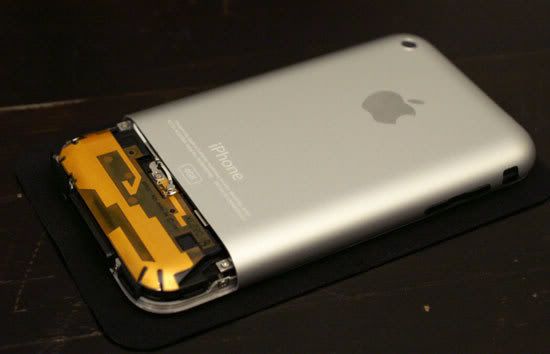 The first step to disassemble the device is to remove the lower black plastic piece; heating it up and squeezing a razorblade in there made it not only possible, but easy: 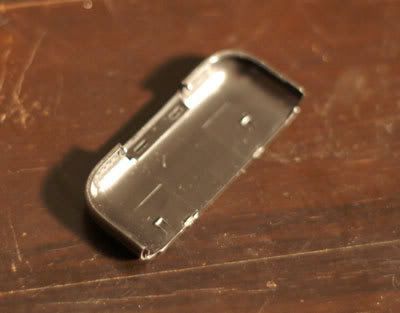 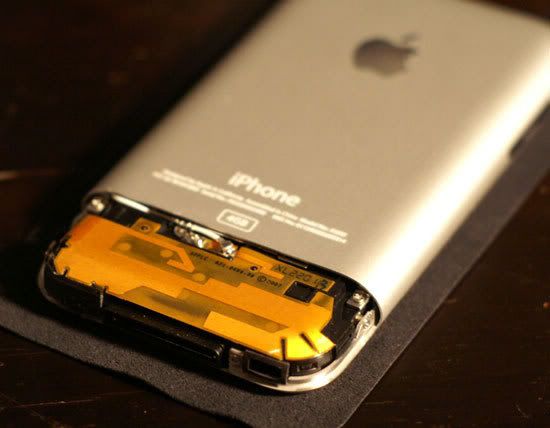 Then came the process of removing the brushed aluminum cover, which wasn't nearly as easy. After a lot of bending, pulling and other unfathomable things one would do to a brand new iPhone we were left with this 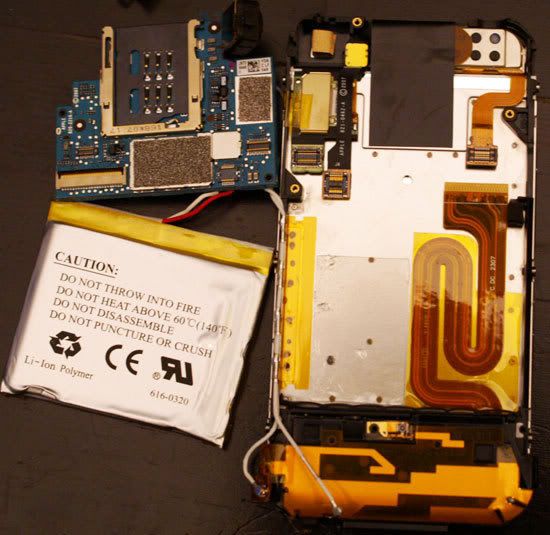 Ignore the slightly bent iPhone casing, we swear it came this way The lower part of the iPhone, covered in black, is where the GSM and WiFi antenna reside 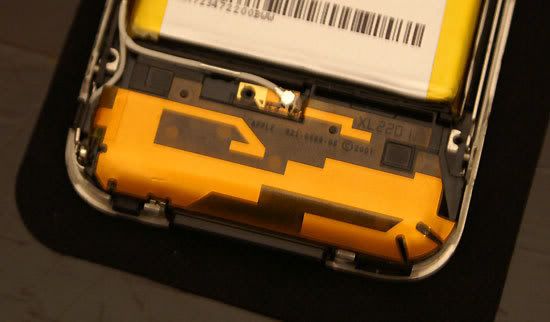 The yellow membrane above is common among GSM mobile phones. The black circle at the lower left of this picture is the camera, and the two white cables are antenna interfaces to the motherboard 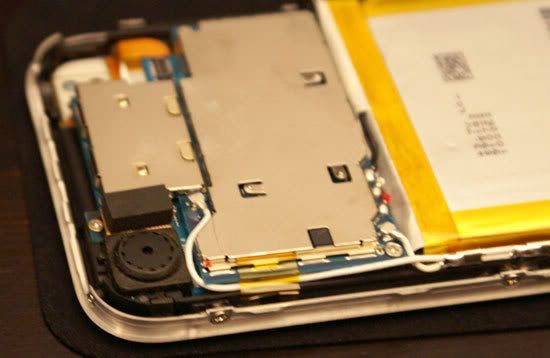 The PCB that the two white wires run to is actually the top layer of the iPhone's entire motherboard, it is incredibly compact. The rest of the phone is basically a battery and the GSM and USB interfaces. 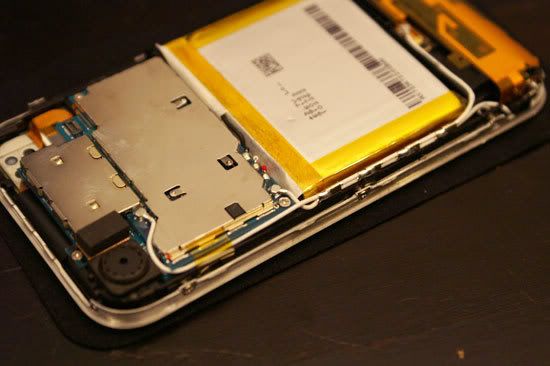 The big yellow thing in the middle is the iPhone battery; you're definitely not replacing this thing on your own. The motherboard in the iPhone is very compact; it is actually composed of two separate PCBs that are sandwiched together. |
 |
| The Following 2 Users Say Thank You to bronce For This Useful Post: |
|
07-27-2008, 11:04
| #2 (permalink) |
| No Life Poster Join Date: Apr 2007 Location: Taguig CT Age: 42
Posts: 2,507
Member: 488875 Status: Offline Sonork: 100.1626294 Thanks Meter: 1,129 | The upper left hand corner of the picture is the PCB sandwich that makes the iPhone tick; the black slot you're seeing here is for the SIM card; the cable port on the lower left of the motherboard appears to be the LCD interface. The topmost PCB appears to have the 802.11b/g wireless controller as well as most of the other microprocessors necessary for the cell phone aspects of the iPhone: 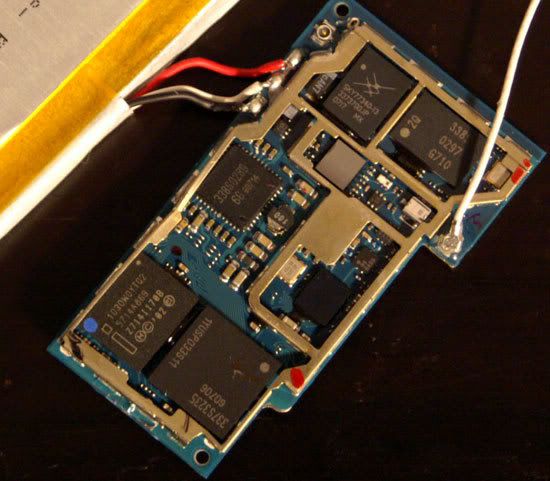 Note that we've removed the EMI shield from the top of this PCB layer in order to show off the individual components. 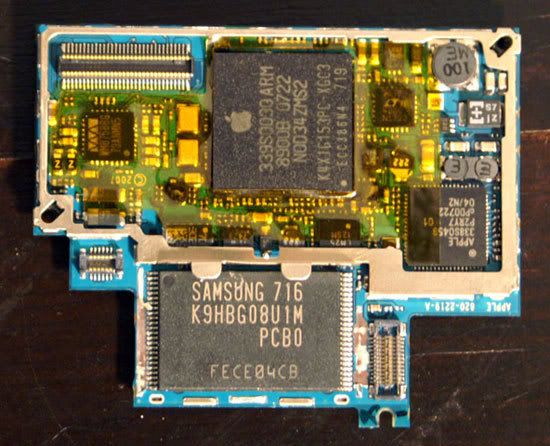 The lower PCB layer features the 4GB MLC NAND Flash (made by Samsung), as well as the iPhone's main processor. Two of the chips on this board have Apple logos on them, the larger of the two appears to be the iPhone's ARM processor manufactured by Samsung. 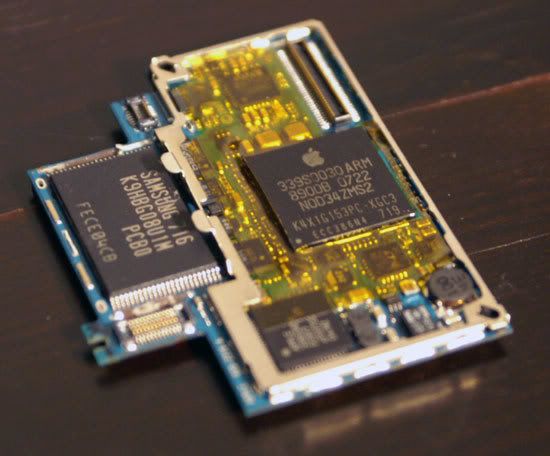 Samsung's S3C6400 based on the ARM1176 core, however some readers have written us stating that it's more likely to be the S3C2460; judging by the model numbers on the chip itself, the ARM processor may be a part of a multi-chip package that includes 1Gbit of system memory, for running the iPhone's OS. The K4X1G153PC-XGC3 is a Samsung part number, indicating a 1Gbit memory device, but it is placed on the same package as the ARM processor itself. 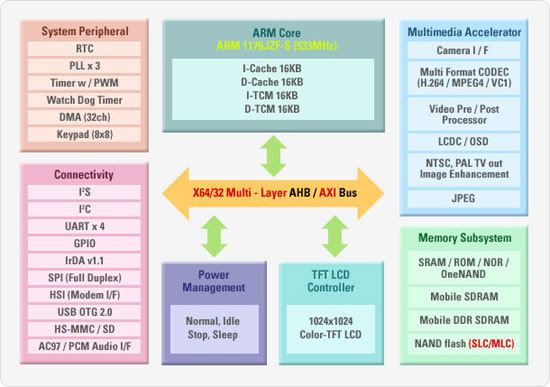 With the motherboard itself pulled apart and inventoried, we turned to the multi-touch screen:  Will it ever work again? The picture below has this part flipped over as the first stage of dissection Below is a depiction of the stages of dissection: 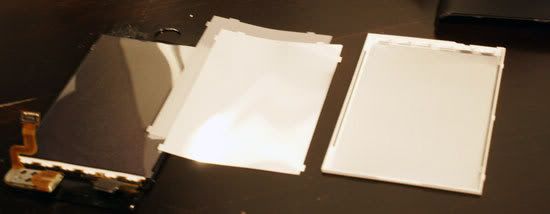 |
| |
|
07-27-2008, 11:06
| #3 (permalink) |
| No Life Poster Join Date: Apr 2007 Location: Taguig CT Age: 42
Posts: 2,507
Member: 488875 Status: Offline Sonork: 100.1626294 Thanks Meter: 1,129 | The leftmost picture is the LCD and layer immediately behind it, followed by the middle two layers and then the final piece of the screen assembly. 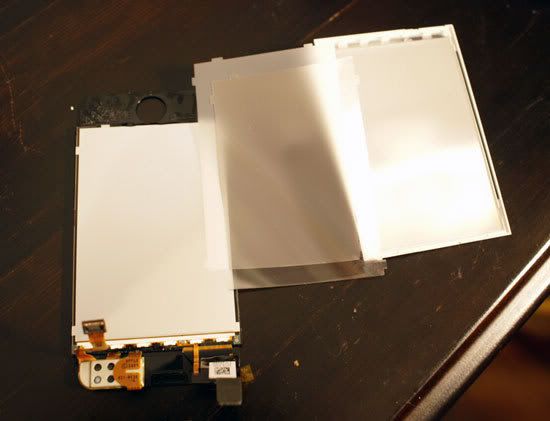 A closer look at the middle layers of the iPhone screen setup: 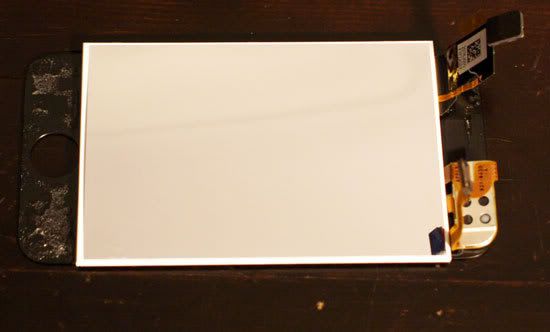 The final piece, the one closest to the motherboard, has a faint pattern of dots laid out in a grid which you can sort of see in the picture below: 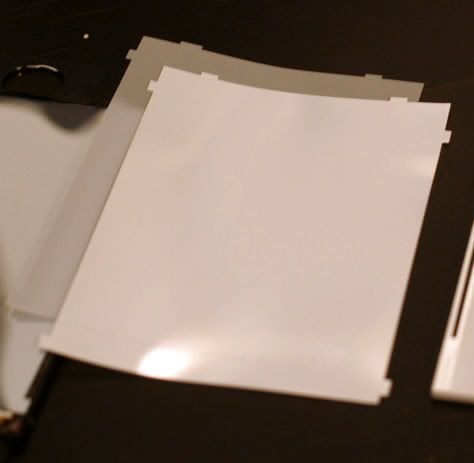 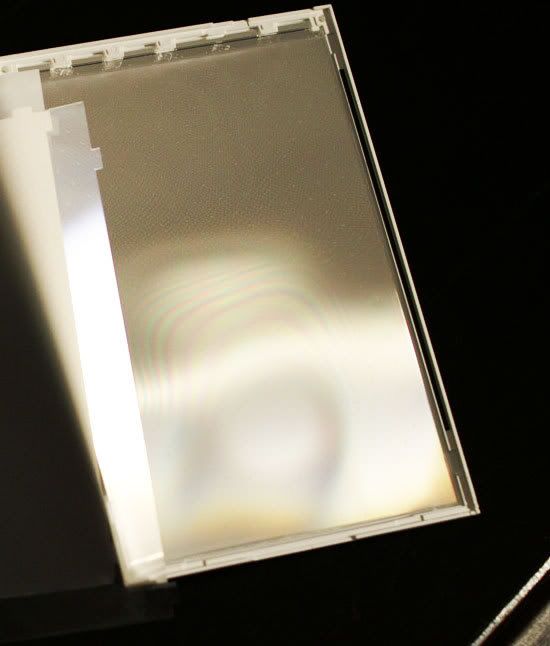 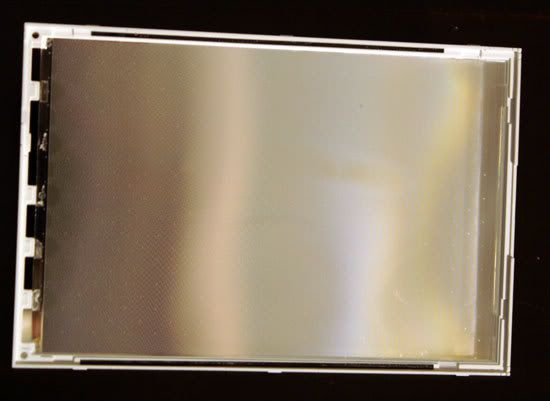 The grid continues down the entire panel, once again necessary for the multi-touch screen. 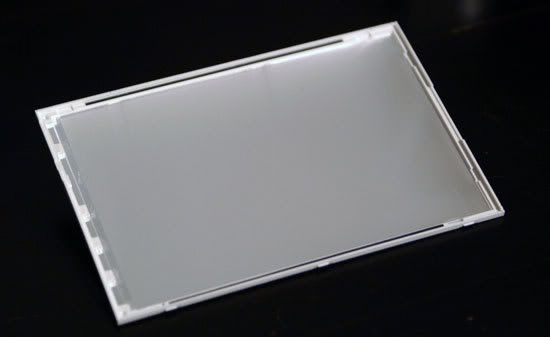 Taking apart the screen left us with this (don't worry, this isn't the iPhone we're reviewing  ...): ...):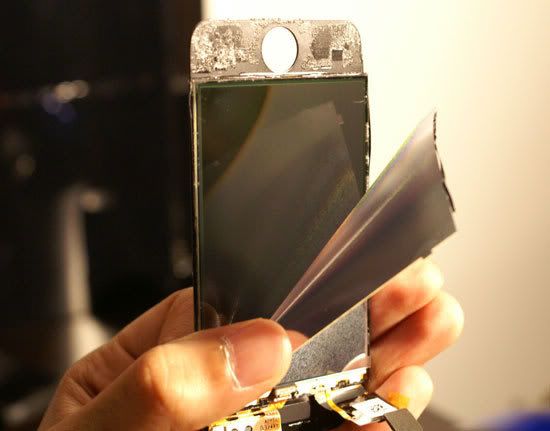 The screen we're pulling away is a somewhat translucent surface, behind it is the touch screen surface itself. With the screen removed, here's all we're left with on the other side of the iPhone: 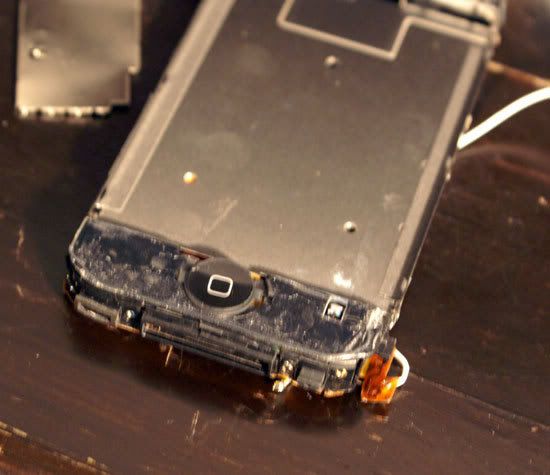 if this thread is already made, kindly remove. |
| |
| The Following 6 Users Say Thank You to bronce For This Useful Post: |
|
07-27-2008, 11:18
| #5 (permalink) |
| No Life Poster Join Date: Apr 2005 Location: HEART BEATS Age: 37
Posts: 2,200
Member: 141675 Status: Offline Thanks Meter: 7,641 | GOOD WORK FOR MORE INFO CHECK http://www.powerbookmedic.com/iphone/inside.html http://www.macnn.com/articles/07/06/...e.disassembly/ |
| |
| The Following 2 Users Say Thank You to malikkk For This Useful Post: |
|
| Bookmarks |
| |
 Similar Threads
 | ||||
| Thread | Thread Starter | Forum | Replies | Last Post |
| basics of mobile phone repairing guide | tesebiruk | Nokia Hardware & Hardware Repair | 1 | 01-31-2009 19:10 |
| d807 disassembly and repair guid | psycho22 | Samsung Hardware Repair | 0 | 03-30-2007 21:52 |
|
|


 Linear Mode


