


|
|
 |
|
Welcome to the GSM-Forum forums. You are currently viewing our boards as a guest which gives you limited access to view most discussions and access our other features. Only registered members may post questions, contact other members or search our database of over 8 million posts. Registration is fast, simple and absolutely free so please - Click to REGISTER! If you have any problems with the registration process or your account login, please contact contact us . |
| |||||||
| Register | FAQ | Donate | Forum Rules | Root any Device | ★iPhone Unlock★ | ★ Direct Codes ★ | Direct Unlock Source |
| iPhone, iPad, iPod - FAQ, Guide, How To, Tutorials , News iPhone, iPad, iPod Jail break, Activation and Unlocking Step by Step How-To: Help, Guides , Tutorials and News |
 |
| | LinkBack | Thread Tools | Display Modes |
 07-26-2016, 15:54
| #1 (permalink) |
| Moderator  Join Date: Oct 2011 Location: U.A.E
Posts: 2,356
Member: 1676524 Status: Offline Sonork: 100.1608473 Thanks Meter: 2,713  | Its officially JailbreakMe-style, and in this tutorial, well show you how to do it! This is a semi-untethered jailbreak, which means you have to re-launch the jailbreak app on the device after every reboot in order to make Cydia functional again. Nevertheless, it works like any other jailbreak and lets you customize your device to your liking with jailbreak tweaks and extensions. Jailbreak iOS 9.3.3, no computer needed If youre eager to get jailbroken again, you can now do it right from your iOS device without the need to run any software on your computer. This is especially useful if you dont have Windows at your disposal. To jailbreak iOS 9.3.3 on your device, follow these steps: 1) Update your iOS device to iOS 9.3.3. I highly recommend this step because iOS 9.3.3 has all the latest bug fixes and security improvements, yet it can still be jailbroken. 2) Disable your passcode and disable Find My iPhone on your device for the greatest chance of jailbreak success. 3) Launch Safari on your iPhone, iPod touch, or iPad and visit the following URL: imokhles.com/pangujb/. Edit: developer tells us to use this link going forward: http://totoateam.com/pangujb 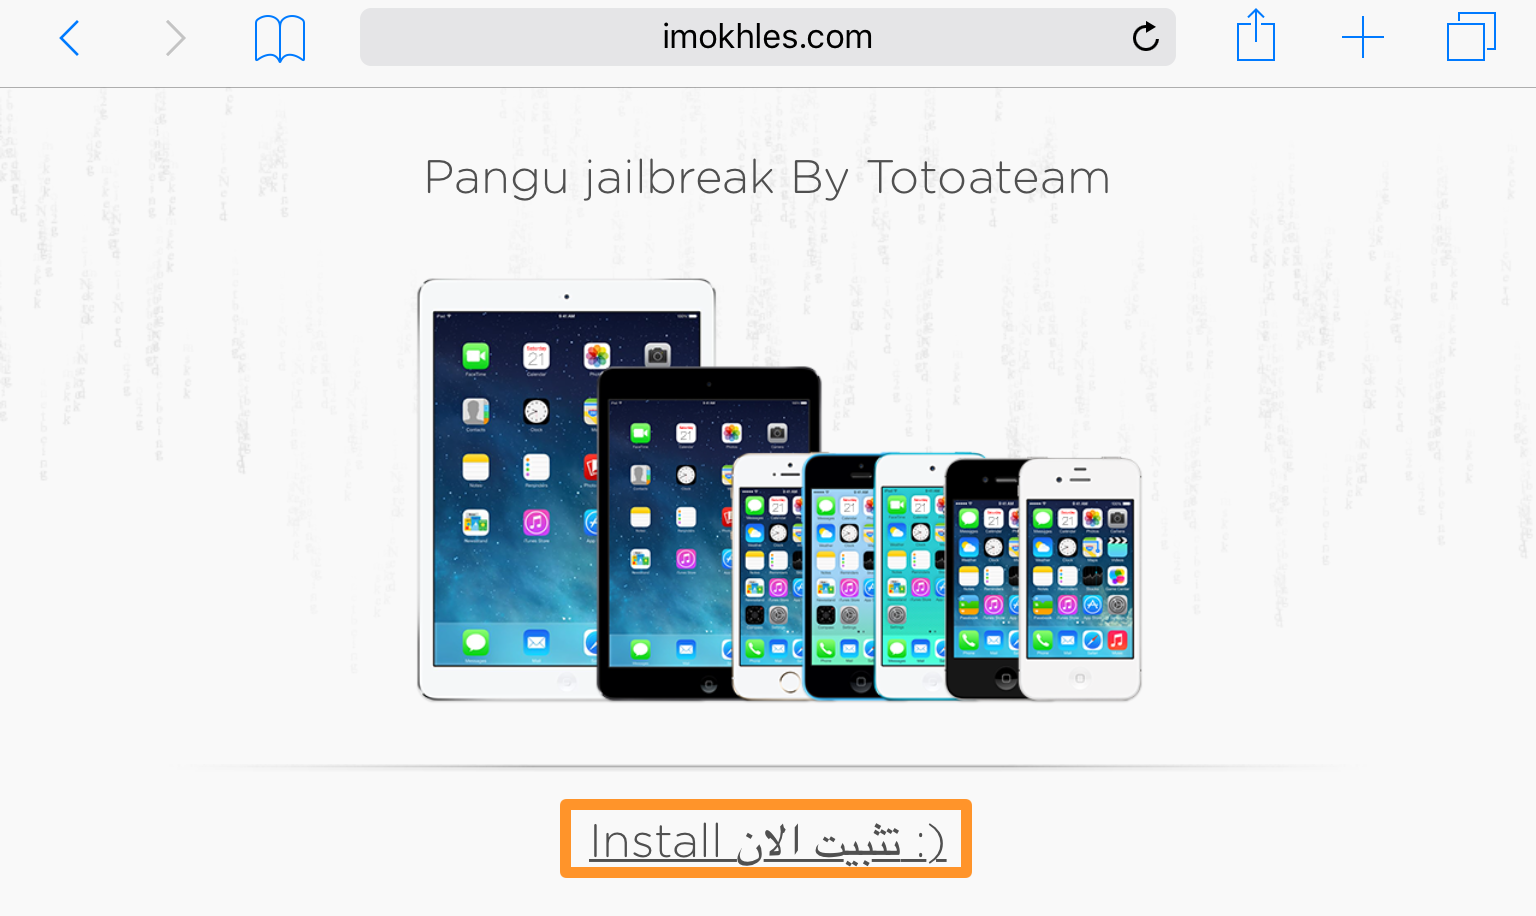 4) Tap on the Install button just below the first image on the website. 5) You will be prompted to install the jailbreak on your device. Tap on the Install button.  6) Wait several moments, and the Pangu/PP jailbreak app will be added to your Home screen: 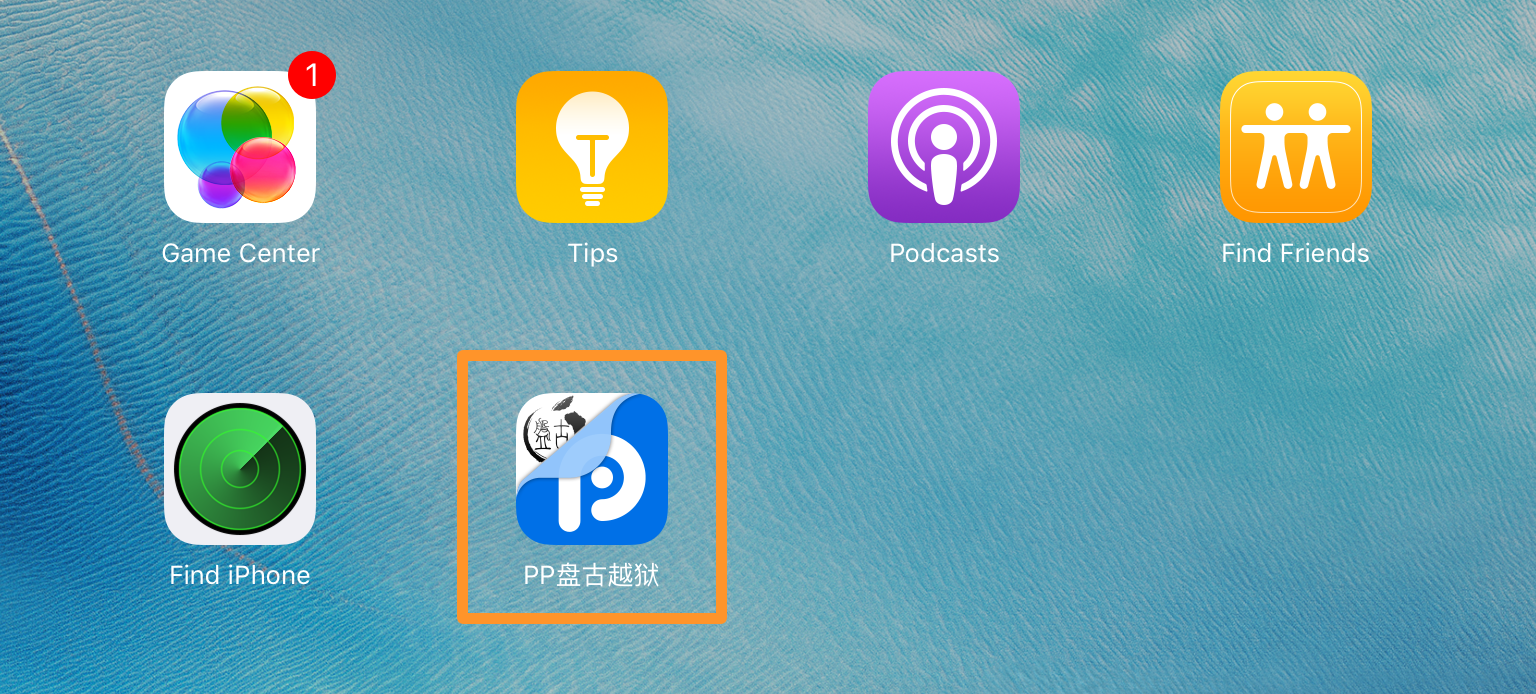 7) Open the Settings app and navigate to General > Device Management: 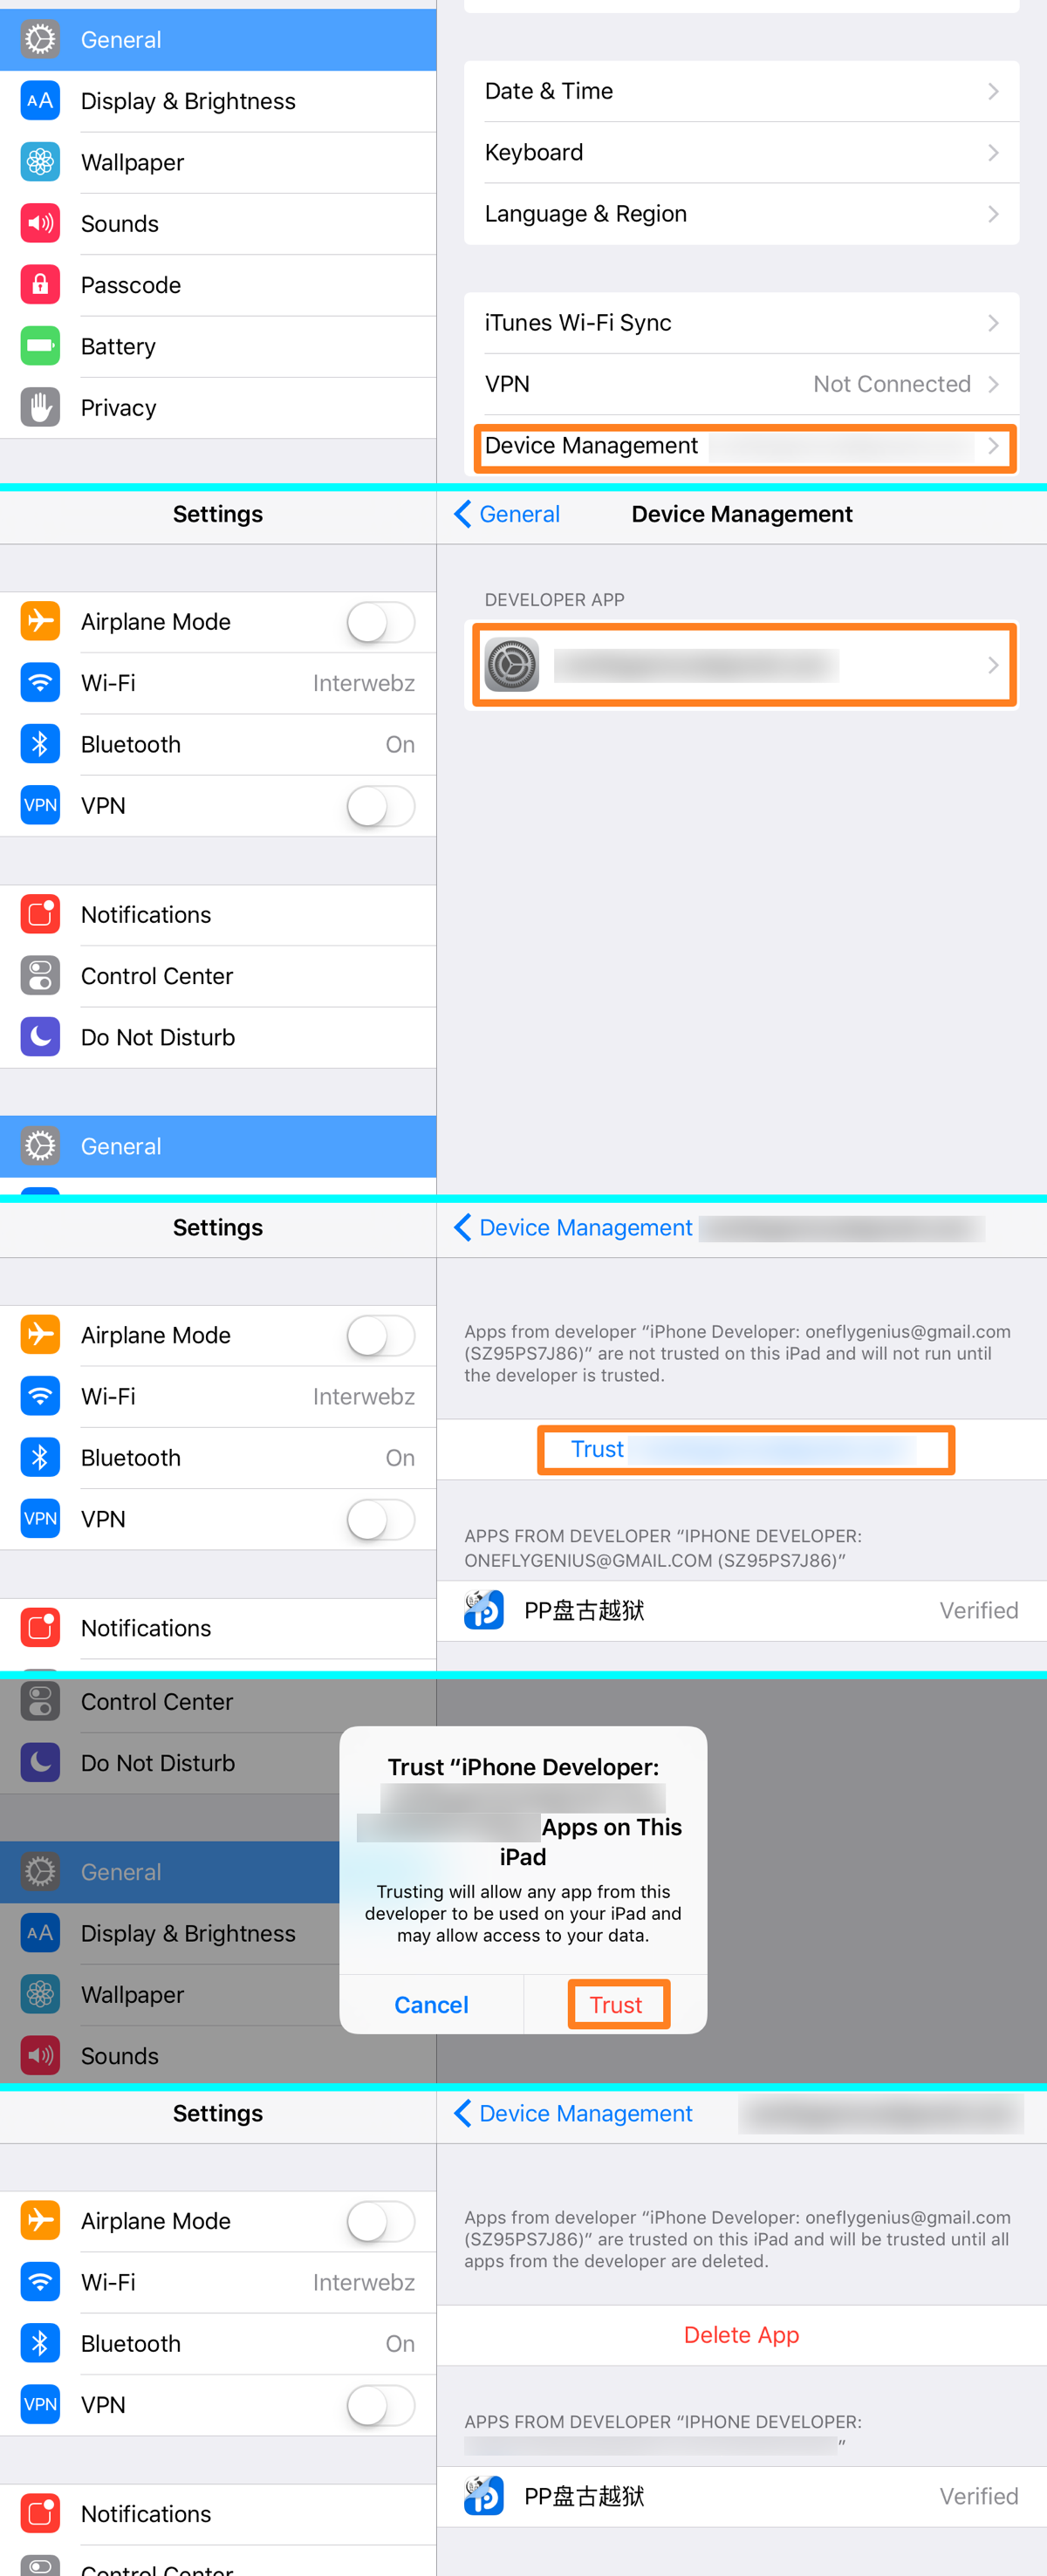 8) Tap on the profile that appears here, and then tap on the blue Trust button that appears with the downloaded certificate. 9) In the pop-up prompt, tap on the red Trust button, and then go to your Home screen after youve successfully trusted the profile. 10) Launch the Pangu/PP app and allow push notifications from the app by tapping on the OK button. 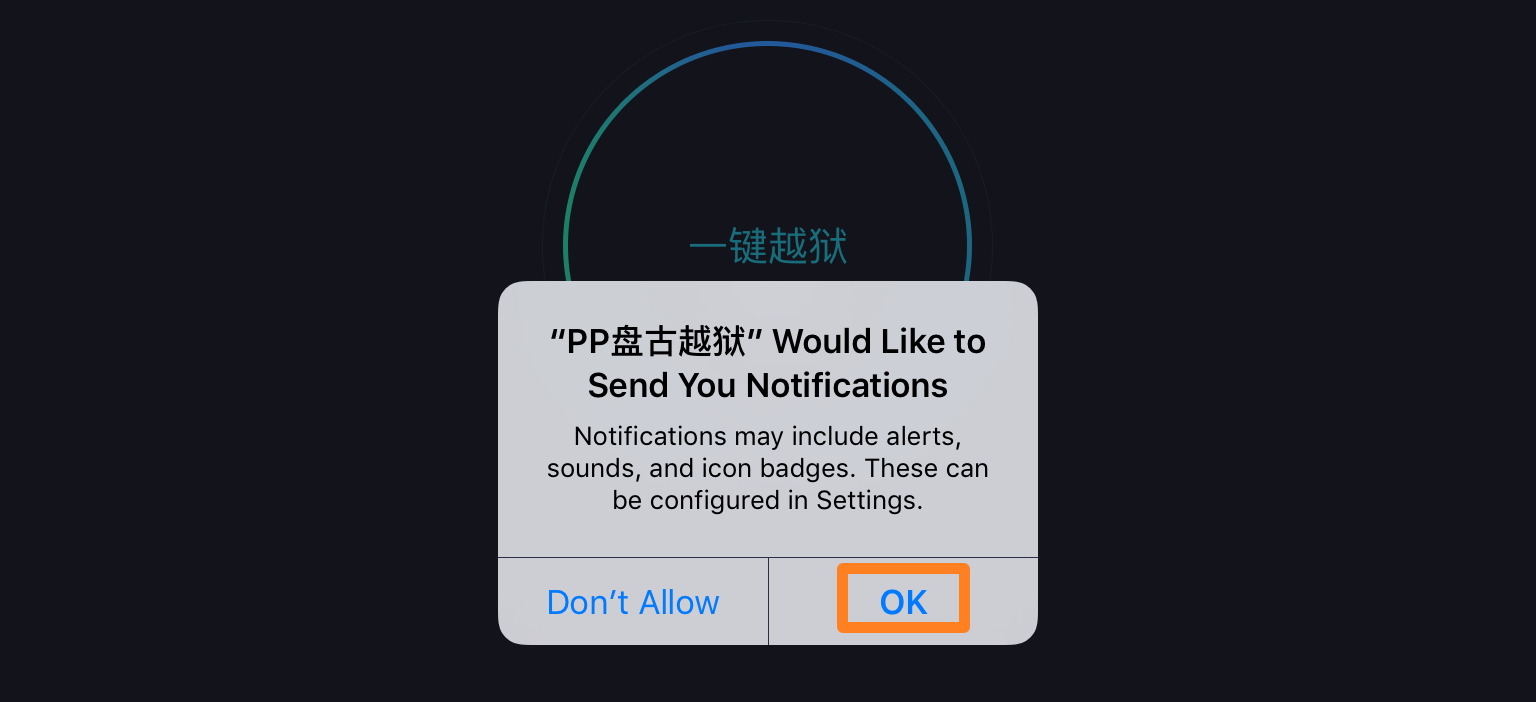 11) Next, tap on the circle in the middle of the app, and it should turn into text:  12) Press the lock button on your device to put it to sleep, and you should soon see a storage getting full notification, as well as a notification from the Pangu/PP app:  13) Wait a little while longer, and your device should respring. This is Cydia being added to your device and preparing its filesystem. When it boots back up, you should see Cydia on your Home screen: 14) Launch Cydia, and all your repositories will sync so you can start downloading jailbreak tweaks. Youre all set! You now have a jailbroken iOS 9.3.3 device without even having to use a computer for any of it!  Wrapping up The fact that the jailbreak was semi-untethered was a turn-off for many people, but honestly, its not that bad. How often do you really need to turn your device off completely anyways? Now that you can jailbreak iOS 9.3.3 directly from the device itself, it just makes the jailbreak that much more convenient to perform, and we hope more people whove been waiting jump on board. |
 |
|
| Bookmarks |
| |
|
|


 Linear Mode


